When we bought our previous trailer I was able to find a net online for Sarah’s bed to keep her from falling out. It was necessary to screw a couple of buckles into the ceiling and bunk to do this. I didn’t want the installation to be so “visible” this time and my search led me to products readily available such as these two:


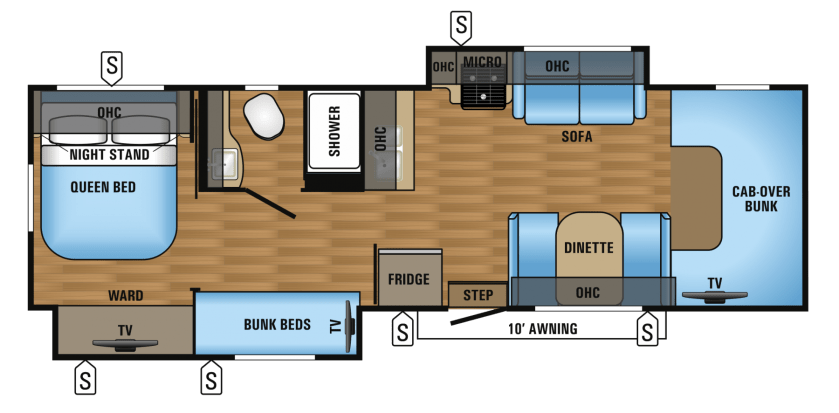
The bunks in travel trailers and RV’s have a ledge or bottom rail and the front to keep the mattress from falling off while in transit. The above child guards only work on a flush fitting mattress such as between a mattress and a boxspring.
After a lot of web surfing it became evident that what I needed wasn’t out there and I would have to fabricate something. I ordered 1×4 and 1×2 cherry boards and brass screws from Home Depot and and found hardware to attach the rails to the side wall and bottom of the bunk using hardware I found at Woodcraft.com. I used their No Mortise Bed Rail Fittings and Center Bed Rail Supports to attach to these surfaces respectively. These brackets allowed the rails to be easily removable for bunk access. I sanded the cherry boards until all the edges were smooth and pocketed the screws so there was nothing to catch on the sheets or blankets (or kids). Once I had built two identical rails for the bunk beds and a third rail for the cabover bunk I then went to my local hardware store with a piece of trim from the Greyhawk for the purposes of matching the stain to the color of our cherry woodwork in the camper. I bought Minwax Golden Oak Stain, Minwax Semi-gloss Polyurethane and a high quality brush to apply the poly.
This whole project took about 4-5 days as a lot of time was required to allow things to dry between coats. The cost was about $200 for wood, screws, hardware, stain etc.
After two coats of stain, three coats of poly and a lot of sanding you can find the finished product in the video below. The bunk rails have been kid tested one night so far and have held up fine. Thanks for stopping by.