Screen Door Mods and Preventing things from Falling Off Shelves

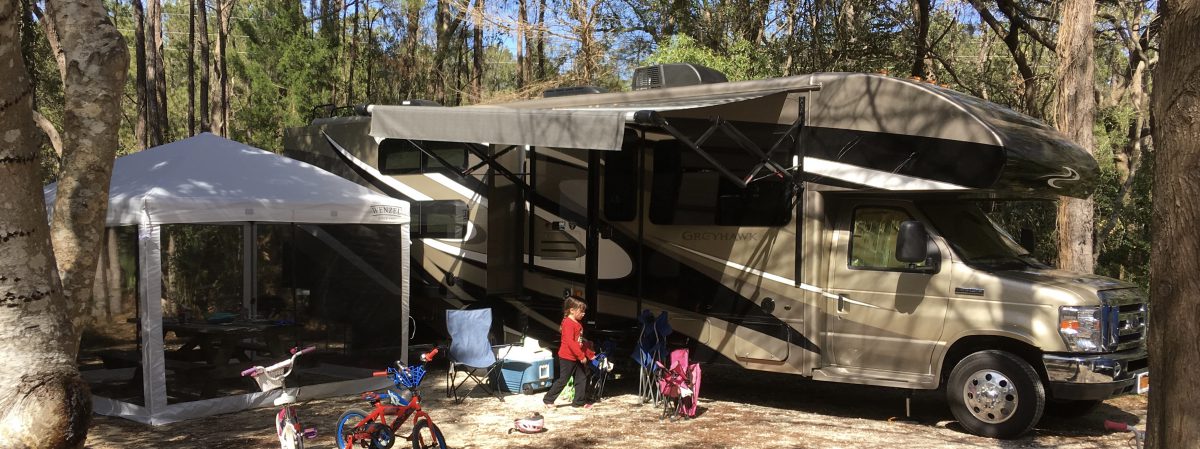
After our shakedown trip from South Carolina, we realized we needed to make some mods to our RV screen door, possibly the most used piece of equipment on our camper. It turns out we were spoiled with the screen door on our old camper which had a device that allowed you to depress the screen door handle without moving the slider. I purchased one of these without measuring first, thinking these might all be a standard size. As it turns out it was too small, so I had to find out an alternative means to open the door from  the inside. First I tried using a small piece of shade cord which worked fine except it was a little too low. I later found a product from Camco RV called the screen door opener in which you drill a 9/16″ hole in the slider and can depress the screen door handle by lifting up on the Camco handle. You can see a pic of this below on the lower right.

We also discovered that the children have a knack for leaving the screen door open when entering or exiting the camper. This lets the mosquitos in and the dog out. The Screen Door Closer kit also from Camco solves that problem. I had installed a common spring from a hardware store on our old camper but Camco’s kit adds a second spring and hardware for probably not much more. Kudos to Camco for coming up with this and packaging it. The kit works great with the installation of just four screws.

I aslo installed a screen door grille by Camco which I had removed from our old screen door. On that camper it was for the kids, on this one it’s for our dog. Also a four screw installation, very easy. It adjustable so it should fit every type of screen door.

Our last screen door mod wasn’t purchased. I noticed that every time the kids needed to enter the RV from the outside they had to climb up both steps to reach the screen door handle, then back down the same two steps in order to have room to open the outward opening door. Now while holding the door, they now have to climb up the steps again to enter. It’s no wonder they’re leaving the screen door open constantly! I drilled a tiny hole in the screen door handle and threaded the end of a piece of shade cord (different piece than the one I mentioned above) through it, tying a knot at the very end. The other end was lead down the outside of the door through a loop terminating near the bottom of the screen door which can be reached with by the children standing at ground level outside the camper. Now they just have to walk up, pull the cord, opening the door, and simply climb the steps once. Sure, they could use the exercise but the previous process of climbing the stairs multiple times has surely led to more bugs entering the camper. You can check out this install as well as the screen door guard and the opener and closer kits mentioned above in the video below.

I also installed small eye loops and bungee cords at the end of this video as we had stuff launching themselves at us from our medicine and hall pantry cabinets very time we came to a stop after driving. I had the hardware left over from another project and ordered the smallest size bungee cords to string between them creating fiddles that will keep these things from falling out in the future. Thanks for stopping by.

Jeep Mods – Bumpers and Winch

IMG_2502

The Jeep Wrangler is one of the easiest tow behind vehicles available today. You pretty much put the transfer case in neutral and off you go. What’s left to do now is a to find a way to attach it  to the motorhome and rig a system to activate the brakes and taillights. I’ll get to that in a future post but the former has led me to seek out installing a tow bar base plate kit or better yet a bumper that has D-ring mounts that  adapters can be made to fasten to the D-ring mounts on one end and the tow bar on the other end. I chose the bumper as I could mount a winch inside of it, further enhancing the off road capabilities of the Jeep. Thinking ahead of places we may travel to, I may like to venture further when the pavement ends.

I found a great deal on a set of  Shrockworks bumpers and sliders through a third party that was stuck with the items after a customer never showed. The installation was pretty straight forward. Shrockworks made it possible to utilize a lot of stock holes and mounts with little drilling. I installed a Warn Powerplant Winch inside the bumper in case I might need to rescue myself or somebody else out on the trail. I opted for the 12,00o pound size on the winch as if I used a snatch block I could double the capacity of the winch, say a 24,000 pound motorhome. I swapped out the winch cable with Viking Synthetic Winchline that’s lighter, stronger and safer  under tension than the winch cable. This led me also to replacing the Warn Winch Hook with a Viking one to accommodate the larger thimble and an AEV License Plate Kit was necessary since I lost the plate mount with the old bumper.

IMG_2501
With this plate kit, all you have to do is remove the two thumbscrews to remove the license plate, gaining access to the winch hawse lead.

I also installed a Shrockworks rear bumper as well which has integrated back up lights which greatly help at reversing at night. The rear bumper was even more straightforward than the front one and had a cutout for the trailer connection.

I also received Shrockworks Rock Sliders with that I mounted as well. The pic below shows the sliders installed as well as how the Jeep hooks up to the motorhome. It’s taken from some distance away but it helps illustrate the whole picture and why I went with the front bumper install.

IMG_3131

Also check out the video below documenting the install. I find that when I’m in the thick of it working on things sometimes I either forget or forego the camera as I get so engaged in the task at hand  but I think this combination of stills and short video clips serves to at least highlight these mods. Thanks for stopping by.

Myrtle Beach, SC

After leaving Charleston, we started making our way back North and stopped for 3 nights in Myrtle Beach, South Carolina. We booked Lakewood Camping Resort for it’s indoor heated pool so our kids would be able to swim should it not be warm enough (more on that later). Lakewood Camping Resort boasts about 1900 campsites which is way larger than any campground we’ve encountered so far and it’s also oceanfront. We were literally, six campsites from the dunes!

Photo courtesy of Trip Advisor

We arrived in the late afternoon, set up quickly, prepared a quick dinner and hit the pool for an evening swim. Instant hit for the kids. The next morning we headed out to the playground but when the kids spotted the ocean they were quick to dismount their bikes and check it out. Mind you, we were only “wading” when minutes later they were fully wet from head to toe.

IMG_1003
This was the last time I saw them dry. Watch the video at the top of the page to see what quickly ensued.

This was the first time, Ava and Ryan had seen the ocean and all three of them were thrilled. They probably spent an hour running from the waves and letting them soak them through. There was so much sand in their clothes I had to dip them in fresh water to get most of the sand out.

IMG_3457
Yep, how well they listen…

We washed up and made our way over to the strand to ride the the Skywheel and grab a quick lunch on the boardwalk. We later had some ice cream and  found a haunted house  that was supposed to be open all year according to my travel guide but was clearly closed the day we were there.

Here’s the thing: a lot of what happens in Myrtle Beach is seasonal but we were escaping the February New York weather and anything beats just spending the week off of school in the cold. Many attractions do close and some open as early as March first including the outdoor pool and splash zone at our campground. We ended up finding Ripley’s Mirror Maze next door to the haunted house which was way overpriced based on the limited experience it offers. This is something we probably would not have done but it was a consolation prize for disappointed kids (though I think the age requirement might have been 6 and older for the haunted house so it may have not been meant to be after all).

skywheel
Courtesy: Gotomyrtlebeach.com

We then went back to the campground for another swim in the pool, made a campfire (right on the grass without a fire ring) and went to bed. The following day we went out seeking the Ripley’s Aquarium on a recommendation Linda got from a couple in Charleston.The kids had a great time even if it did seem a bit small compared to the aquariums we’ve visited so far, perhaps we’re spoiled. The jellyfish touch tank was a completely new experience as was the glass bottomed boat ride even if was just pulled around the top of the shark tank on a set of ropes.


The weather was warming up as we left the aquarium. It was forecasted to be 74 degrees but actually got up to near eighty. We drove back to Lakewood, threw on our bathing suits and went for a dip in the ocean. I took the kids out a bit to where they were swimming and riding the waves and they absolutely loved it! The water temperature had to be around sixty degrees and when they kids started turning blue we headed for the heated pool, rinsing off the saltwater and and having a relaxing swim.

We headed out early the next morning but had an absolute blast in Myrtle Beach and the kids are already asking to go back. I can’t believe they took to the ocean as well as they did.  It’s a testament to the adventurous spirit that’s being  fostered in them by taking the trips we take. Our next trip is in the planning so stay tuned. Thanks for stopping by.

Charleston, SC

It occurred to me once we were in South Carolina that George’s maiden voyage (George is our RV) to South Carolina was perhaps the furthest trip we’re to take this year. This was a shakedown trip and we were following the weather and so we ventured about 800 miles South. I’m happy to say he did quite well. Just a few items that need to be looked at by the dealer like the AC but we didn’t need it on this trip. He handled the road quite well and was comfortable to drive and we love all the new found space inside.

We left around 7 on Friday night and drove ’til about 12 or 12:30 where I  got a few of hours sleep at a rest area before heading on our way again. Our first stop was in Lumberton, NC where we visited Linda’s extended family , ate supper and stayed an additional night on their farm. After having a wonderful breakfast with them Sunday morning we were on our way again to our next destination, The Campground at James Island County Park.

trip-to-charleston-sir-buffalo-sushi-221
Courtesy: sirbuffalosushi.wordpress.com

The James Island County Park Campground is part of a larger public park about ten minutes out of Charleston and you’re able to use all the facilities of the park while staying at the campground without having to pay any additional use fees. There’s a great playground, miles paved of bike paths, a small lake with a beach and dog park, a climbing wall and exploration center as well as access to Folly Beach on the weekdays. We really enjoyed our stay here and would definitely stay again when we’re back down this way..

We hung around the campground and explored our first day here venturing into Charleston the following two days. On the first day in Charleston we booked a carriage or “horsey ride” which gave you a wonderful geographic and historical view of the town. We had a quick dinner at the Noizy Oyster afterwords  and went back to enjoy our campfire.

img_3388
I think this may be a reaction to the horse manure very nearby…

The next day we headed out early to take the kids on on a pirate tour. Sabrina was our pirate lady host and she carried an actual parrot on her shoulder. She presented the kids with pirate hats, swords and treasure maps while entertaining the adults with many historical facts about Charleston, pirates and various battles and skirmishes.  The children then followed the clues on the map to find a hidden treasure chest at the end. They collected their loot and were presented with balloon parrots. Sarah was a natural. I’d take her treasure hunting anyday.

If you pay an additional $5 per adult on this tour you get tickets to the Old Exchange Museum. The big attraction here is the Dungeon Tour.The kids enjoyed the mannequins dressed up in period clothing and how they were jailed and shackled down there.We enjoyed the historical aspect of it and besides, how may times do you get to go down in a real dungeon?

img_3442
Ava front and center listening as to how the colonials hid their black powder from the Brits.

All in all, Charleston is a great historical find with a lot of ghost stories and sordid past to keep the kids interested while intriguing you with lots of interesting history. Stay tuned as we head up to Myrtle Beach, SC next. Thanks for stopping by.

%d bloggers like this: