Charleston, SC

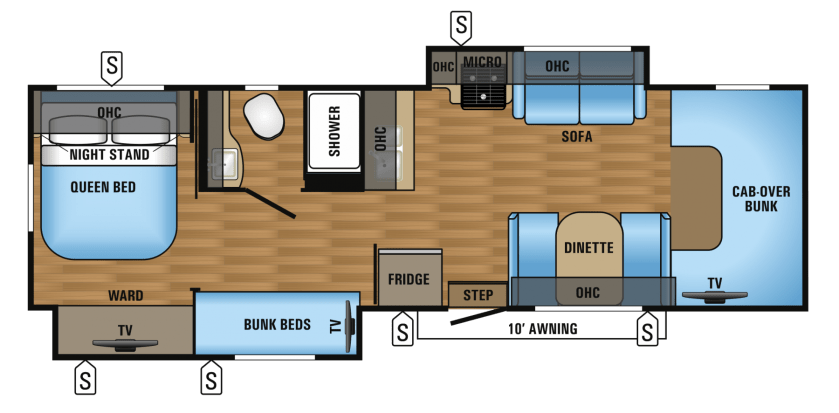
It occurred to me once we were in South Carolina that George’s maiden voyage (George is our RV) to South Carolina was perhaps the furthest trip we’re to take this year. This was a shakedown trip and we were following the weather and so we ventured about 800 miles South. I’m happy to say he did quite well. Just a few items that need to be looked at by the dealer like the AC but we didn’t need it on this trip. He handled the road quite well and was comfortable to drive and we love all the new found space inside.

We left around 7 on Friday night and drove ’til about 12 or 12:30 where I  got a few of hours sleep at a rest area before heading on our way again. Our first stop was in Lumberton, NC where we visited Linda’s extended family , ate supper and stayed an additional night on their farm. After having a wonderful breakfast with them Sunday morning we were on our way again to our next destination, The Campground at James Island County Park.

trip-to-charleston-sir-buffalo-sushi-221
Courtesy: sirbuffalosushi.wordpress.com

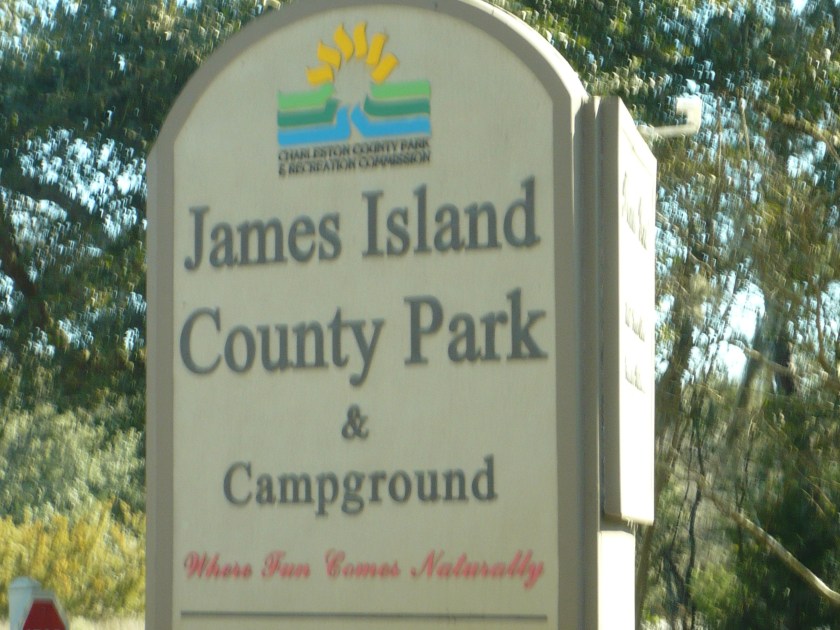
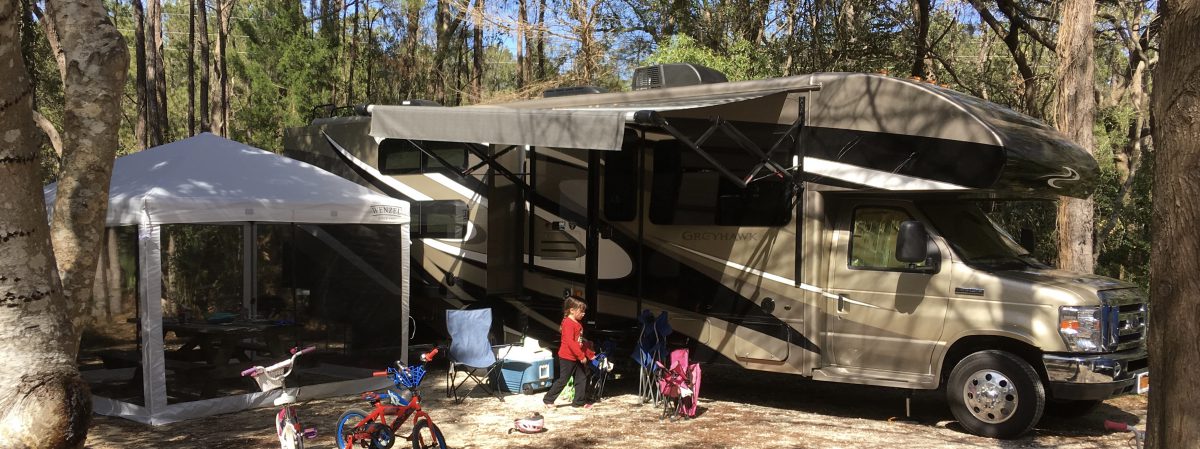
The James Island County Park Campground is part of a larger public park about ten minutes out of Charleston and you’re able to use all the facilities of the park while staying at the campground without having to pay any additional use fees. There’s a great playground, miles paved of bike paths, a small lake with a beach and dog park, a climbing wall and exploration center as well as access to Folly Beach on the weekdays. We really enjoyed our stay here and would definitely stay again when we’re back down this way..

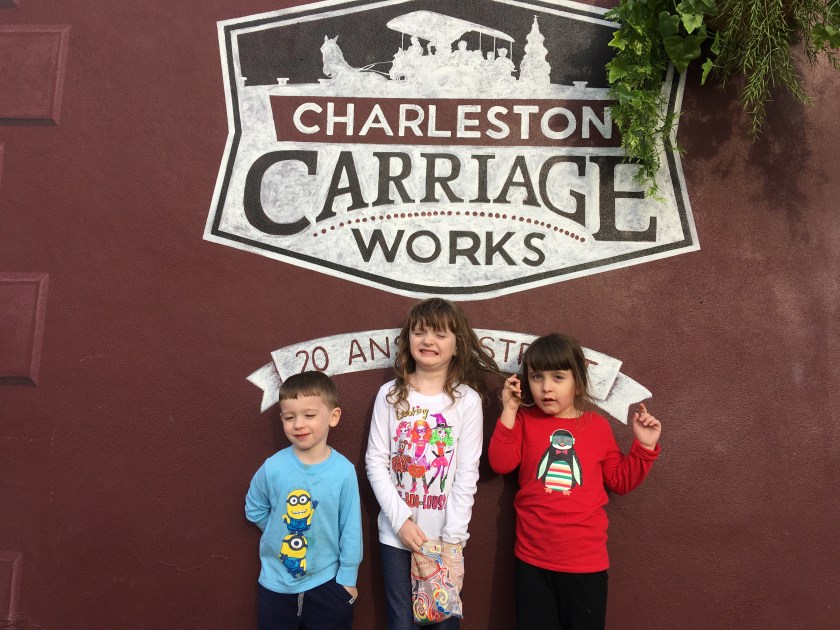
We hung around the campground and explored our first day here venturing into Charleston the following two days. On the first day in Charleston we booked a carriage or “horsey ride” which gave you a wonderful geographic and historical view of the town. We had a quick dinner at the Noizy Oyster afterwords  and went back to enjoy our campfire.

img_3388
I think this may be a reaction to the horse manure very nearby…

The next day we headed out early to take the kids on on a pirate tour. Sabrina was our pirate lady host and she carried an actual parrot on her shoulder. She presented the kids with pirate hats, swords and treasure maps while entertaining the adults with many historical facts about Charleston, pirates and various battles and skirmishes.  The children then followed the clues on the map to find a hidden treasure chest at the end. They collected their loot and were presented with balloon parrots. Sarah was a natural. I’d take her treasure hunting anyday.

If you pay an additional $5 per adult on this tour you get tickets to the Old Exchange Museum. The big attraction here is the Dungeon Tour.The kids enjoyed the mannequins dressed up in period clothing and how they were jailed and shackled down there.We enjoyed the historical aspect of it and besides, how may times do you get to go down in a real dungeon?

img_3442
Ava front and center listening as to how the colonials hid their black powder from the Brits.

All in all, Charleston is a great historical find with a lot of ghost stories and sordid past to keep the kids interested while intriguing you with lots of interesting history. Stay tuned as we head up to Myrtle Beach, SC next. Thanks for stopping by.

Ultra Guard Mudflap Install and Maxxair Ventcovers

When our Greyhawk was delivered to Albany RV I had asked them to install a couple of items although I usually prefer completing such tasks on my own. Reason being: I took delivery the end of December and the weather was getting cold and besides, am I not busy enough already?

I asked them to install an Ultra Guard Mudflap and Maxxair Ventcovers to help ease the burden of outfitting our new RV. Mixed results. They installed the vent covers and those came out well but  immediately prior to delivery I noticed that the mudflap was not installed. After some information seeking by our delivery person, I found out that Ultra Guard had sent the wrong part and the dealership would drop ship the correct part to me once they received it. I guess I could have waited on the delivery or could have driven the camper back to RV One to have them  install it but that would have meant another three hour drive back to Albany.

This leads me to the install video below:


As mentioned in the video, to install one of these you will most likely need to order their angle iron separately. Their angled steel kit (part #0094) has the appropriate holes that match up to their mudflap so the only holes you need to drill are the ones to mount the steel kit to your motorhome. I chose to drill 1/2″ holes and though bolt it to my framerails. I also shot the frame holes and angle iron with Rustoleum and Rust Converter to protect it as it came shipped as bare metal (big problem up here in the Northeast). The piece also had to be trimmed for my Class C. I had the 20″ mudflap sent to me but had to trim it down to 13″ tall. The install took about two hours and and the ordering of an extra part but it should be well worth it if it protects my Jeep from rock chips as I’m pulling it down the road.

The Maxxair vent covers are going to serve quite nicely as well. I never got around to installing them on our previous trailer and I would always make sure I’d close my bath vent when leaving our camper as I was afraid a pop up shower might soak the inside of our camper. Now I can leave these open and not worry about getting water damage. We have a standard vent fan in the bath but a fantastic fan in the bedroom, just make sure to order the right vent cover if you have this type of high flow fan because if it doesn’t have enough air flow it could overheat. Maxxair designed a specific cover for these fans.

So if you want something done right do it yourself?  Maybe… half right in this case but as you’ll learn with RV’s, perfection is rare and there’s always another job to do. Thanks for stopping by.

Driveway Camping

We’ve owned our Greyhawk now for about a month and the kids finally talked me into driveway camping a last weekend. We had a lot of fun! They gave me tours of their bunks and we watched Beauty and the Beast, Aladdin and played Spot It before turning in around 10 pm. Sarah is really good at Spot It while Ava and Ryan are learning. The next morning we played Spot It again followed by the kid’s game: Yeti in the Spaghetti.

I felt this was a really good first introduction to their bunks before we get the opportunity to sleep in them on our first trip and though we were dry camping it gave me the opportunity to see how the furnace and other systems performed for an extended time. We may do some more  driveway camping before our first trip but this night was a milestone as it was our first night in the new motorhome. Thanks for stopping by.

Greyhawk Bunk Rail Build

When we bought our previous trailer I was able to find a net online for Sarah’s bed to keep her from falling out. It was necessary to screw a couple of buckles into the ceiling and bunk to do this.  I didn’t want the installation to be so “visible” this time and my search led me to products readily available such as these two:

The bunks in travel trailers and RV’s have a ledge or bottom rail and the front to keep the mattress from falling off while in transit. The above child guards only work on a flush fitting mattress such as between a mattress and a boxspring.

After a lot of web surfing it became evident that what I needed wasn’t out there and I would have to fabricate something. I ordered 1×4 and 1×2 cherry boards and brass screws from Home Depot and and found hardware to attach the rails to the side wall and bottom of the bunk using hardware I found at Woodcraft.com. I used their No Mortise Bed Rail Fittings and Center Bed Rail Supports to attach to these surfaces respectively. These brackets allowed the rails to be easily removable for bunk access. I sanded the cherry boards until all the edges were smooth and pocketed the screws so there was nothing to catch on the sheets or blankets (or kids). Once I had built two identical rails for the bunk beds and a third rail for the cabover bunk I then went to my local hardware store with a piece of trim from the Greyhawk for the purposes of matching the stain to the color of our cherry woodwork in the camper. I bought Minwax Golden Oak Stain, Minwax Semi-gloss Polyurethane and a high quality brush to apply the poly.

This whole project took about 4-5 days as a lot of time was required to allow things to dry between coats. The cost was about $200 for wood, screws, hardware, stain etc.

After two coats of stain, three coats of poly and a lot of sanding you can find the finished product in the video below. The bunk rails have been kid tested one night so far and have held up fine. Thanks for stopping by.


Greyhawk Mods – Part One

I’ve been getting the camper ready for use and have found it necessary to perform a few modifications to be ready for Spring camping. The first mod I didn’t even know was necessary until I started reading through the Jayco Owners Forums , (I’ll confess to have been reading them for approximately a year or so in my motorhome research). The cabover  TV for safety reasons is wired to only play while the vehicle is off. Turn on the ignition and that TV cuts out as well as anything plugged into that outlet (DVD player for all my TV’s). Since I can’t possibly watch that TV while driving, I chose to “enable” it to play while underway. It’s a real simple: cut or disconnect the lead (purple or red) feeding the relay glued to the back of the outlet, insulate it with electrical tape and reassemble.

The next mod was to provide some privacy for the cab windows and keep the summer heat out. Heatshieldstore.com has heat shields for the windshield and side windows. I like the gold series but the original is still attractive as well.

Lastly, we found mattress safe.com to provide the specialty RV mattress protectors we were looking for to protect our investment. They have a special size for the overhead bunks of Class C Motorhomes as well as the bunks in the back. The Essential Campers Sheet is an all in one. It’s feels like a sheet on top but has a protective layer on the underside that will protect the mattress from spills, etc. We also bought a standard mattress protector from them as well for our specially sized RV Queen Bed (60 x 72) to protect the Denver Mattress. All the products, mattress protectors and sunshades,  fit quite well and we’re pleased so far. Check out the video below highlighting some of these modifications. Thanks for stopping by.


Our 2017 Jayco Greyhawk 31FS

I did a lot of research when deciding to buy a larger camper for my family. We looked into Fifth Wheels, Class A Motorhomes, Class C Motorhomes, Super C Motorhomes and even Toyhaulers. In the end, only a Class C had the dedicated bunk space for each of our three children. We wanted each child to have a retreat that they can go to whether we’re driving or at the campground, at night and also in the middle of the day if need be. A jack knife sofa or drop down bunk just didn’t seem to fit these needs. Many bunkhouse motorhomes are built for two adults and two children. Now add a third child to the mix and the choices narrow significantly. Enter the tried and true Class C Motorhome with dedicated third cabover bunk. Very similar to the RV I grew up vacationing in. Now which Class C?  A quest for the right manufacturer led me to Jayco with their two year warranty, solid reputation and great floorpan. There’s a lot of detail and functional features to the Greyhawk that don’t seem to be present on other Class C’s. With that, I’ve heard you’ll pay a little more for a Jayco but that was inconsequential once I made up my mind. You can find our floorpan below:

3710-31fs

What I love: The floorplan, 7,500 pound towing capacity, the performance, fit and finish, large windows, navigation,  entertainment options, materials, exterior body paint, seamless fiberglass cap, full fiberglass roof, exterior propane hookup, frameless windows, generator, aluminum wheels, large bathroom,  tankless hot water heater, dedicated bunk space for all the kids.

Alright we all know nothing can be perfect and there’s trade off for everything, hence there’s no perfect RV as well. So heres a few things I’d change if I could (and some I can and might attempt sometime): Small camp side awning due to to bunk slide out, only one house battery, tankless hot water heater*, rear window only for emergency exit (no screen), door only opens 90 degrees, limited exterior storage.

You might have noticed the tankless hot water system made it onto both lists. I like the idea of us all taking showers relatively back to back and not running out of hot water however I’d like to boondock at some National Parks and while the system is “tankless” the gray water tank is just that: a tank. A tank that’s going to fill up quickly. We’ll have to figure that one out when we get there. Maybe not take showers for those few days when we stay at those type of parks. I’ve read in the forums that there’s also a learning curve when it come to this on demand unit so we’ll let you know how we make out (fingers crossed). It’s standard equipment with no other option available so we really had no other choice.

Check out Jayco’s 31FS page here with a 360 degree tour available:

https://www.jayco.com/products/class-c-motorhomes/2017-greyhawk/31fs/

Also feel free to check out our comprehensive 28 minute driveway walk through below:

That’s it for now. Besides the trip back from Albany towing the Jeep behind us, our experience is limited so far but we’ll be sure to update you as we go along. I am planning a few minor modifications as well and I’ll  post them up on this site in the weeks to come. Thanks for stopping by.

Welcome George!

We’re pleased to welcome George, our new 2017 Jayco Greyhawk 31FS class C motorhome, to our family. We’ve kind of kept under wraps but we had factory ordered it way back at the end of August. We’d quickly outgrown our 18 foot travel trailer and were on the quest for dedicated bunk space for our three kids. I looked into fifth wheels, Class A motorhomes, Super C motorhomes and even toy haulers in my quest but in the end I feel the the tried and true bunk house class C motorhome was the perfect fit for our family. We went with Jayco on account of their reputation for producing solid products as well as their two year warranty. It took about 12 weeks to manufacture and a couple more to ship as well as us finding the right window to pick it up three hours north of our house at Albany RV. Thanks to Sandy for making us a great deal and tracking George through his production process. My Dad and I picked it up and we’re pleased  that it actually did fit in the driveway as we had measured. Ironic how we used the Jeep to tow our old camper and now the new camper is actually towing the Jeep. Towing a vehicle (or toad) behind you is a great way to explore an area without having to break down camp each day as would be necessary if you’re using the motorhome for all your driving. The children love it! We spent most of yesterday hanging out in there playing and watching movies. They didn’t want to go back in the house! Check out the short video below for some quick shots of our new Greyhawk.

I plan to post more videos in the coming months to walk you through the Greyhawk 31FS as well as some enhancements we have planned to get him ready for this summer so make sure you stay tuned you our site to catch all of those. Thanks for stopping by.

Welcome, Cooper!

img_3075

We’d like to introduce the newest (and last) member of our family, Cooper. We had promised Sarah a dog when she turned six which somehow turned into Christmas. I knew I’d better research and find one of these dogs as they tend to sell out even before they’re born. Also, Linda is mildly (in some cases) allergic to animals- cats and dogs to be particular so we had to find a breed as hypoallergenic as possible. No breed exists that is truly hypoallergenic  but there are some that come closer than others. Enter the Australian Labradoodle. I found a ALAA Gold Level Breeder in Setauket, Long Island who was just a pleasure to deal with and happened to have a litter of puppies available about the same time we were to come home from Disney. We luckily got our first choice and the rest is history.

Cooper’s been great. 99% house broken right from the start and smart as a whip. It’s hard to describe: he’s quite playful and will chase a ball around forever but when you pick him up in your arms he turns into a complete mush. He loves to be around the kids and is very patient. Cooper’s been exceeding our expectations since he’s come home. Let’s keep our fingers crossed he keeps the same demeanor as he grows. Speaking of growing, Cooper is forecasted to grow between 30 and 40 pounds. A good sized medium dog, great for camping and living in confined spaces like RVs. He’s going on 12 weeks now and we have our first vet appointment next week.

If you happen to be looking for a Labradoodle, get in touch with Eileen with Labradoodles of Long Island. You won’t be disappointed. Thanks for stopping by and if you have any questions about Labradoodles or camping with dogs, please don’t hesitate to drop us a line.


Disney World Trip

Eight months of the planning has finally come to fruition. This time we flew down but hopefully next time we visit we’ll be camping in Fort Wilderness. Besides, we’re camperless at the moment. So much planning goes into a vacation like this especially with the kids being so little but we figured their ages were perfect to introduce them to Disney World for the first time. We had a blast! So many firsts! This was the first time the children were up in an airplane. They really enjoyed that. We stayed at Disney’s Caribbean Beach Resort and they had a really awesome pool area. Sarah and Ava must have logged hundreds of trips down the two waterslides.Meals were a little hectic, inter-Disney transportation was a bit of a rarity of times but that was all forgotten when you were at the pool.

We didn’t get to the parks that the first day but went to Disney’s Hollywood Studios the following day. Starting out with the Beauty and the Beast Show, then the Frozen Singalong followed by dinner at the Brown Derby and finally the Fantasmic Show.

The next day we went to Magic Kingdom and rode “It’s a Small World”, the Peter Pan Ride and saw Mickey’s Philarmagic. We had lunch at Chef Mickeys with Mickey, Minnie, Donald, Daffy and Pluto and later Sarah and I snuck off to ride The Seven Dwarfs Mine Train. She’s not scared of anything. We later joined up again to ride the Flying Dumbo Ride and Aladdin’s Magic Carpet Ride.

We went to Disney’s Animal Kingdom the following day and had lunch at the Tusker House followed by the Lion King performance. We also hiked through their Africa side and saw a lot of cool animals.

Our final day at the parks was back to Magic Kingdom to for the Pirates of the Caribbean and the Swiss Family Robinson Treehouse. We had lunch at The Enchanted Ballroom from Beauty and the Beast and rushed back to Adventureland for the Jungle Cruise. The Tomorrowland Speedway was next the we made off to Disney’s Floridian resort for dinner with the cast from Cinderella. Later on, Sarah and I snuck off to Fastpass Splash Mountain and endure a long wait for Space Mountain. Like I said before, she’s fearless.

We had plans to sneak in a park the last day as we were not flying out until 6:45 pm but we and the kids were burned out so we elected for late check out and played at the pool.


Check out this feature that WDW links with your Memory Maker Package. It’s an actual mini movie featuring individualized pictures from your ride.


It was a busy trip but we all had fun (despite a couple of sick kids) and made lots of memories. This is most likely our last trip for 2016 but stay tuned as we’ll be bringing you some news as well as planning for 2017. Thanks for stopping by.